Develop a CRUD Application using Django and React (Part 1) - Backend
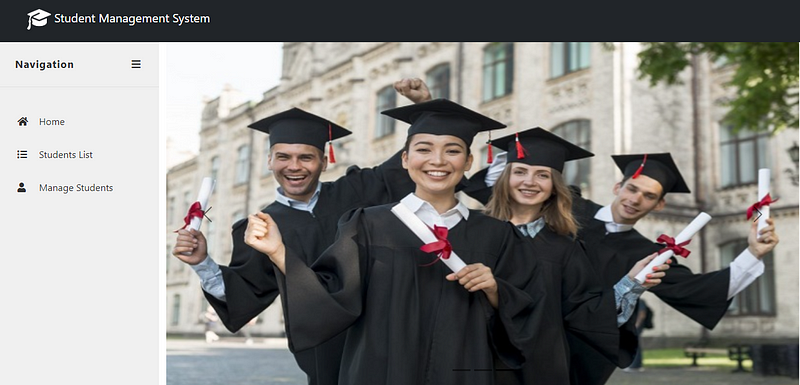
In this Article you will learn to develop a simple student management web application with CRUD operations using Django Rest Framework for backend and React Js for frontend.
The final application will look like this.
Get the full source code from here:
A simple student management web application with CRUD operations developed in Django and React Js - GitHub …github.com
If you are a visual learner the you can watch full video with step by step instructions on YouTube:
Table of Contents:
- Introduction to REST API
- Introduction to CRUD and HTTP Verbs
- Application Architecture
- Steps to Develop the Application
Introduction to REST API
If you have ever wondered how some big web applications like Netflix, Facebook etc work. The main concept behind almost any web application is REST APIs. These applications use REST APIs to interact with the backend data store.
An API (Application Programming Interface) is a set of rules which allows two or more computer programs to communicate with each other.
REST stands for Representational State Transfer which is a software architecture that defines the set of rules and industry standards that developers follow to create APIs.
A RESTful system consists of a
- Client who requests for the resources (Client can be the web browser communing to the backend using frontend)
- Server who has the resources (Server can contain a database for storing the resources and backend using REST APIs to interact with the database)
Introduction to CRUD and HTTP Verbs
CRUD stands for Create, Read, Update and Delete. These are the basic operations that are performed on any web application to create a new resource, get existing resource from database, update an existing resource or delete an existing resource. CRUD are the basic rules to make an API to be considered as REST API.
REST APIs use HTTP (Hypertext transfer protocol) to communicate with programs over the web. The basic HTTP verbs are POST, GET, PUT, PATCH and DELETE which correspond to create, read, update and delete respectively.
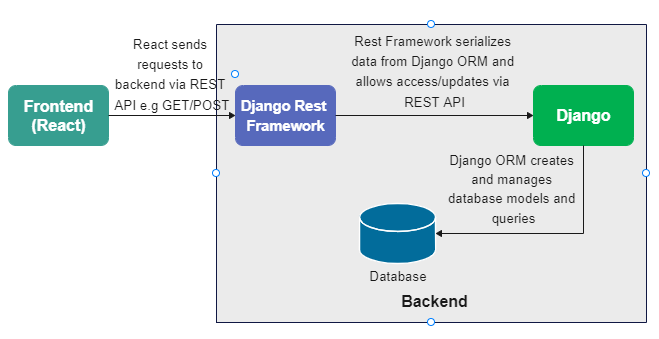
Application Architecture
Let’s look at the architecture of this simple Django web application.
Steps to Develop the Application
Now you understand the basic concepts of REST APIs. Lets start developing the application. First we will develop the backend of the application.
Backend Development
To develop the backend we will need to install Pycharm and Django libraries. If you do not want to use Pycharm then you can use any IDE of your choice.
Requirements:
Python==3.9.13
Django==4.1.1
djangorestframework==3.14.0
django-cors-headers==3.13.0- Download and Install PyCharm community edition from JetBrains website.
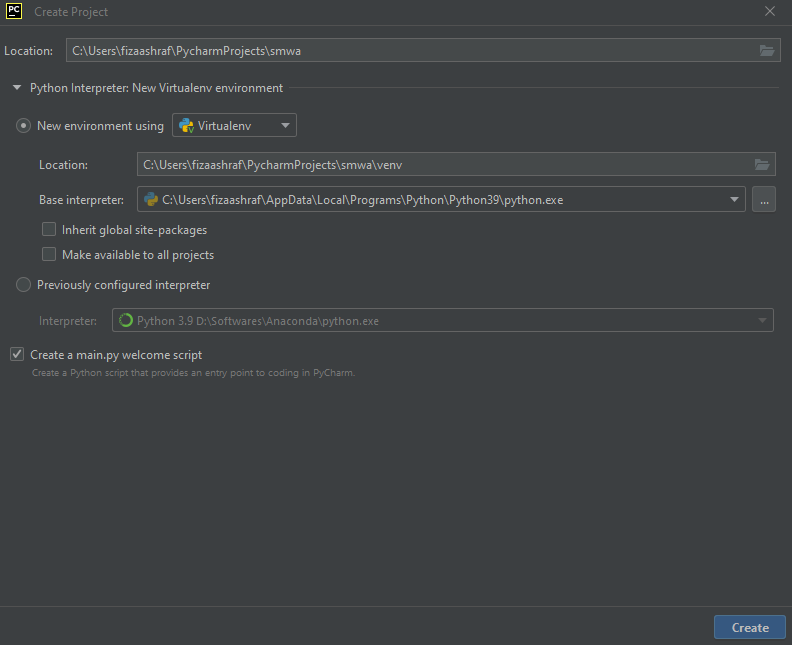
https://www.jetbrains.com/pycharm/download/#section=windows - Open Pycharm and create a new project with a new virtual environment.
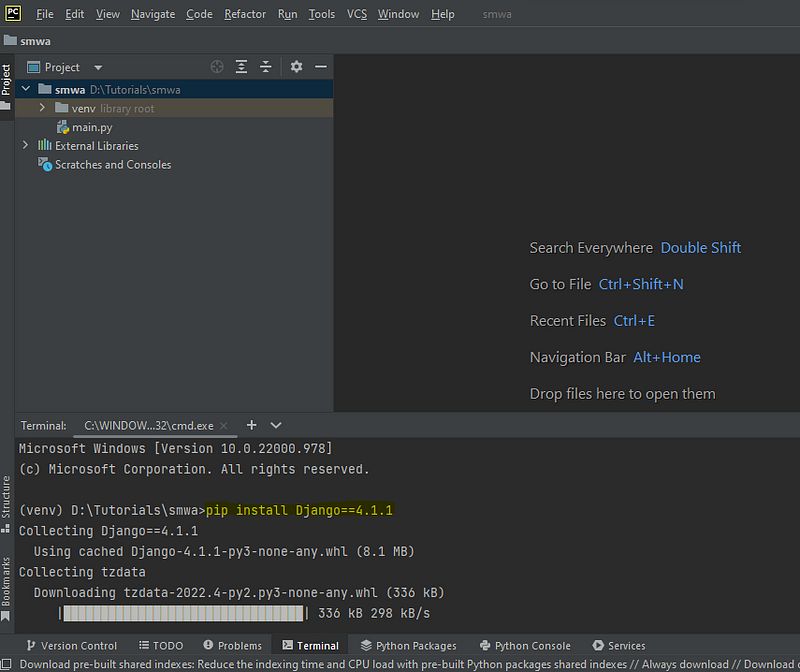
3. Open terminal and install required libraries inside virtual environment.
pip install Django==4.1.1
pip install djangorestframework==3.14.0
pip install django-cors-headers==3.13.0
4. Create a new Django project. This will generate some auto generated code e.g. django project structure, settings etc.
django-admin startproject backendThe project structure should look like this:
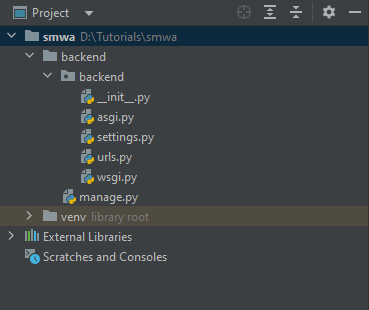
These files are:
- The outer
backend/root directory is a container for your project. Its name doesn’t matter to Django; you can rename it to anything you like. manage.py: A command-line utility that lets you interact with this Django project in various ways. You can read all the details aboutmanage.pyin django-admin and manage.py.- The inner
backend/directory is the actual Python package for your project. Its name is the Python package name you’ll need to use to import anything inside it (e.g.backend.urls). backend/__init__.py: An empty file that tells Python that this directory should be considered a Python package. If you’re a Python beginner, read more about packages in the official Python docs.backend/settings.py: Settings/configuration for this Django project. Django settings will tell you all about how settings work.backend/urls.py: The URL declarations for this Django project; a “table of contents” of your Django-powered site. You can read more about URLs in URL dispatcher.backend/asgi.py: An entry-point for ASGI-compatible web servers to serve your project. See How to deploy with ASGI for more details.backend/wsgi.py: An entry-point for WSGI-compatible web servers to serve your project. See How to deploy with WSGI for more details.
Start Django Server
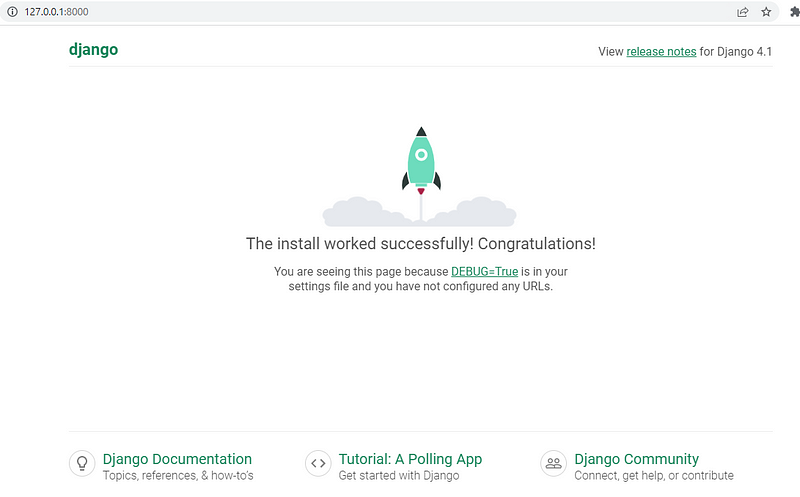
Now that our Django project is created. We can start the development server to test if project is initialized successfully.
Run the below commands to start Django development server
cd backend
python manage.py runserver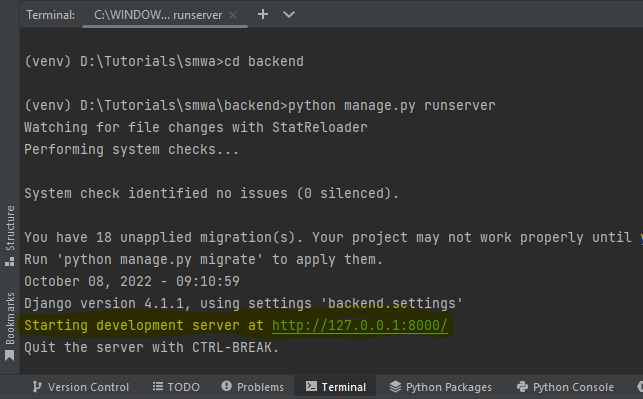
You can access the development server from your browser http://127.0.0.1:8000/
Create Students App
We can now create our first app. In Django each app is a separate python package. You can consider an app a microservice if you are familiar with microservice architecture. When you create an app, Django automatically created the directory structure for you so that you can focus on coding instead of creating directory structure.
To create the students app run the below command in the same directory where your manage.py is:
python manage.py startapp studentsDjango will create the following files in students app directory:
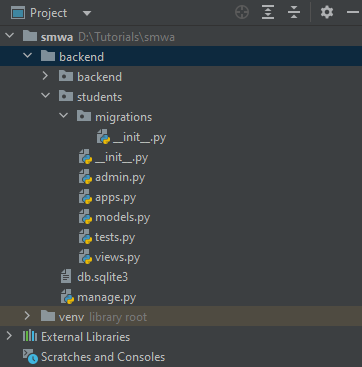
- The
students/migrations/directory will contain the code for migrating Django models into Database e.g. Create table migrations. students/__init__.py: An empty file that tells Python that this directory should be considered a Python packagestudents/admin.py: All students app application models will be registered in this file so that these can be managed from Django admin panel.students/apps.py: This file contains the configuration for the students app e.g. app name.students/models.py: All database models for this app will be created in this file.students/tests.py: All unit tests for this app will be created in this file.students/views.py: Views will contain the logic for handling the HTTP requests e.g. GET, POST, PUT, DELETE etc.
Create Student Model
First we need a model for storing student information. A model is converted to database table when we apply migrations. In your students/models.py file add the below code to create Student model:
from django.db import models


class Student(models.Model):
    studentId = models.AutoField(primary_key=True)
    FirstName = models.CharField(max_length=100)
    LastName = models.CharField(max_length=100)
    RegistrationNo = models.CharField(max_length=100)
    Email = models.CharField(max_length=100)
    Course = models.CharField(max_length=100)
Next we need to apply migrations to create Student table in the database. Django comes with a default SQLite database. We will use the default database for this tutorial. In real application you will be using commercial databases e.g. MySQL, Postgres etc.
Before running the migration we will need to add students app in settings.py file. Open settings.py file and add students.apps.StudentsConfig to INSTALLED_APPS setting:
INSTALLED_APPS = [
    "django.contrib.admin",
    "django.contrib.auth",
    "django.contrib.contenttypes",
    "django.contrib.sessions",
    "django.contrib.messages",
    "django.contrib.staticfiles",
    "students.apps.StudentsConfig",
]
Now run this command to generate migrations script for students app. This will generate the script 0001_initial.py inside students/migrations folder for all the models you defined inside students/models.py. Don’t make any changes to this script.
python manage.py makemigrations students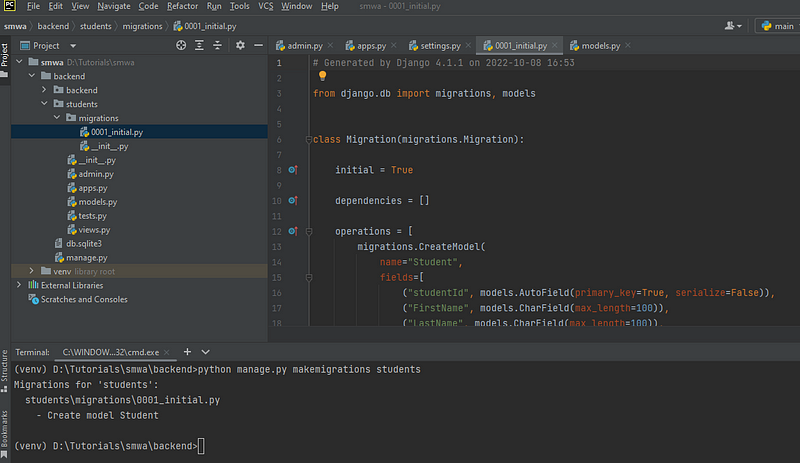
Run below command to review the SQL generated for this migration:
python manage.py sqlmigrate students 0001
Now run migrate to create the student model in your database:
python manage.py migrate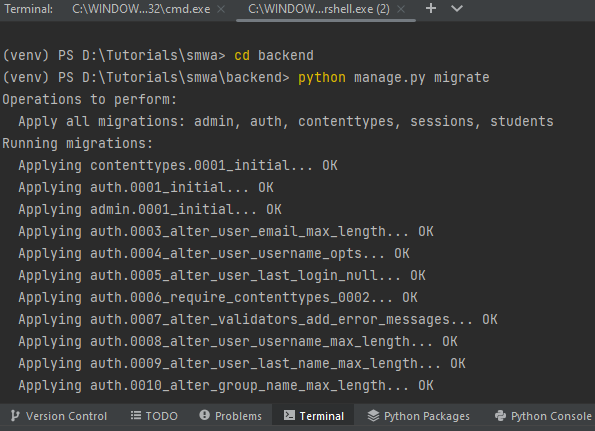
The migration has created the models from Django default apps and our student app which are included in INSTALLED_APPS inside settings.py. You can remove the default apps if you do not want these in your project and want to use your own apps for managing sessions, authentication etc.
Create Admin User
We will need a user who can login to the admin site. Run this command to create admin user:
python manage.py createsuperuserEnter the username and password for the admin user.
Now start the development server and go to http://127.0.0.1:8000/admin/ to login with admin user that you created:
python manage.py runserver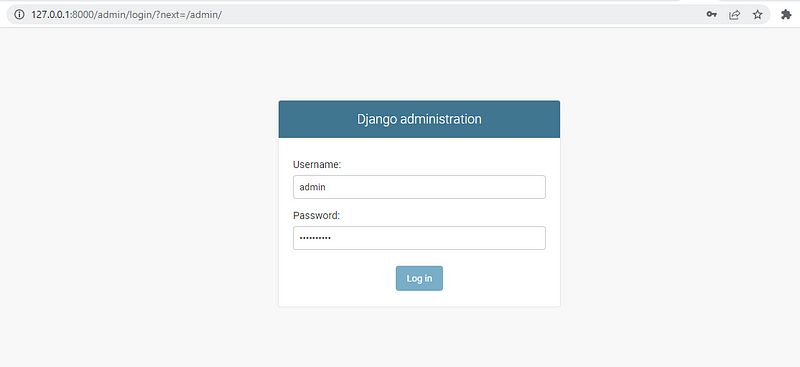
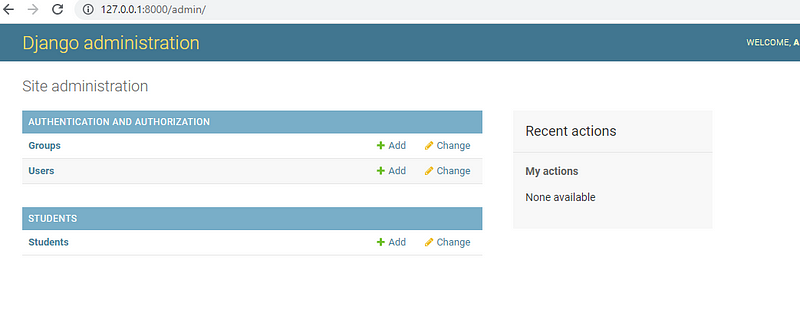
After successful login the Django admin page should look like this:
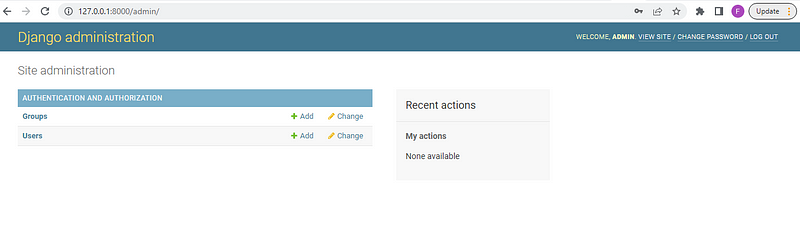
If you are wondering why you can’t see any models for your students app then no worries the migration ran successfully. We have not yet added student model in students/admin.py . Open students/admin.py and add below code in this file:
from django.contrib import admin
from .models import Student

models_list = [Student]
admin.site.register(models_list)
This will register the student model that we created inside models.py file to admin site.
Now refresh the admin page and you should be able to view the changes:
You can add, delete, update student objects from admin panel. Now you must be wondering that if user can add, delete, update objects from Django admin site then why we need to develop REST API and why we need to write frontend in REACT. Well, Django admin site cannot be used for actual application. You will never want your users to directly interact with your database and add, delete, update objects from there. Also you cannot handle any logic in admin site.
We will need to write views to handle user requests. The view will contain the logic to handle CRUD operations.
Create Student Serializer
Before creating our Student view, we need to create a serializer. Serializers allow complex data such as querysets and model instances to be converted to native Python datatypes that can then be easily rendered into JSON, XML or other content types. Serializers also provide deserialization, allowing parsed data to be converted back into complex types, after first validating the incoming data.
Lets create our Student serializer. Create serializers.py file inside students directory. Open students/serializers.py and add below code in this file:
from rest_framework import serializers
from .models import Student


class StudentSerializer(serializers.ModelSerializer):
    class Meta:
        model = Student
        fields = ('studentId',
                  'FirstName',
                  'LastName',
                  'RegistrationNo',
                  'Email',
                  'Course')
Create Student View
We can now write HTTP methods for GET, POST, PUT and DELETE to perform CRUD operation on our student model.
Open students/views.py and add below code in this file to create a new student in Students table.
from django.http.response import Http404
from rest_framework.views import APIView
from rest_framework.response import Response
from django.http.response import JsonResponse
from .models import Student
from .serializers import StudentSerializer


class StudentView(APIView):

    def post(self, request):
        data = request.data
        serializer = StudentSerializer(data=data)

        if serializer.is_valid():
            serializer.save()
            return JsonResponse("Student Added Successfully", safe=False)
        return JsonResponse("Failed to Add Student", safe=False)
There are multiple ways of creating views in Django e.g. you can use decorators. I prefer to use Django REST framework APIView for writing views. Django REST Framework provides simplicity and flexibility to write REST APIs as it contains Generic classes for CRUD operations.
In the first line of post function we get the payload which is usually in json format. Then we load this data into Student Serializer. Serializer provides a function to validate the data provided by user. If the data does not contain any invalid field then we can save the object in the table. Serializer.save will convert the data into model object and save this object into database table.
To call the view, we need to map it to a URL — and for this we need a URLconf.
To create a URLconf in the students directory, create a file called urls.py. Your directory structure should look like this:
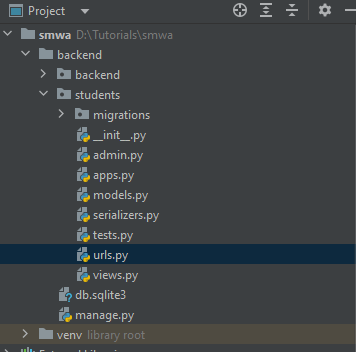
Open urls.py and below code in this file:
from django.urls import path
from .views import StudentView

urlpatterns = [
    path('students/', StudentView.as_view())
]
This url is now available for our students app. But we can still not access it from browser. To make it accessible to Django we will need to include students/urls.py into root URLconf. Open backend/urls.py and include students.urls in urlpatterns list:
from django.contrib import admin
from django.urls import path, include

urlpatterns = [
    path("admin/", admin.site.urls),
    path('', include('students.urls')),
]
Now you should be able to access this path from your web browser. Go to http://localhost:8000/students/
You should see error like below:
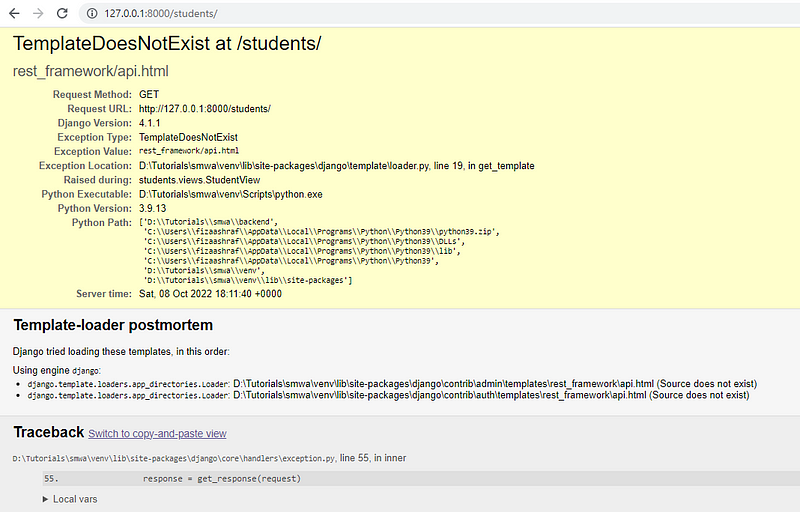
This is because we have not added django-rest-framework app in our INSTALLED_APPS. Open backend/settings.py and include corsheaders and rest_framework apps in INSTALLED_APPS:
INSTALLED_APPS = [
"django.contrib.admin",
"django.contrib.auth",
"django.contrib.contenttypes",
"django.contrib.sessions",
"django.contrib.messages",
"django.contrib.staticfiles",
"students.apps.StudentsConfig",
'corsheaders',
'rest_framework',
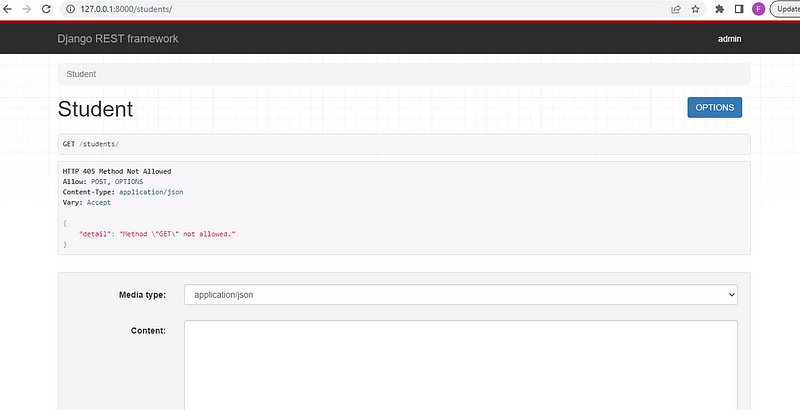
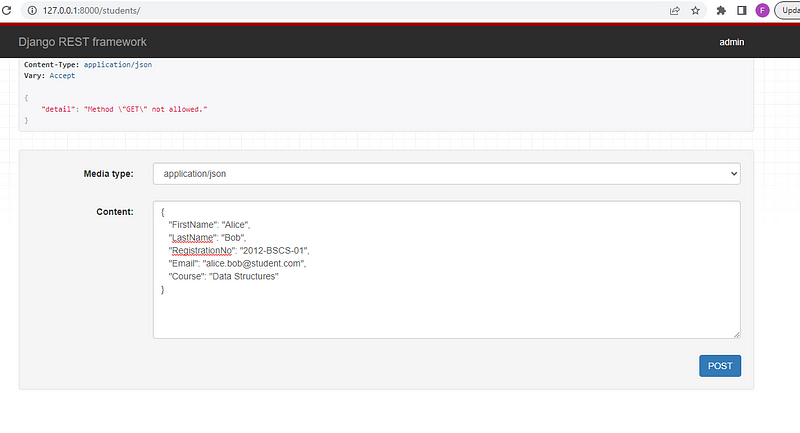
]Now refresh students URL page and you should be able to see page like below:
Test POST Student API:
We can now send the post request to the url http://localhost:8000/students/. This will create a new student in the database table. You can use the Django client to test this but I prefer to use postman:
Add the below payload to the post request:
{
    "FirstName": "Alice",
    "LastName": "Bob",
    "RegistrationNo": "2012-BSCS-01",
    "Email": "alice.bob@student.com",
    "Course": "Data Structures"
}
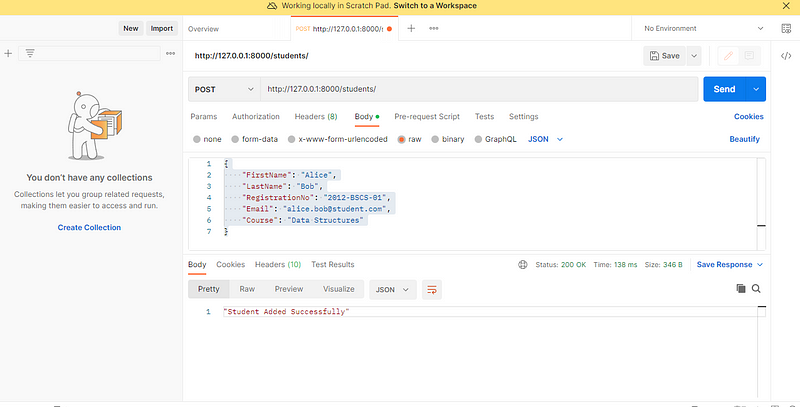
If the request is successful then you should get 200 OK response from the API.
Congratulations, You have created your first Django app with POST request. Next we will implement the other three methods i.e. GET, PUT and DELETE to read, update and delete students.
GET, PUT and DELETE Methods
In your backend/settings.py file add the remaining methods:
GET
def get_student(self, pk):
try:
student = Student.objects.get(studentId=pk)
return student
except Student.DoesNotExist:
raise Http404
def get(self, request, pk=None):
if pk:
data = self.get_student(pk)
serializer = StudentSerializer(data)
else:
data = Student.objects.all()
serializer = StudentSerializer(data, many=True)
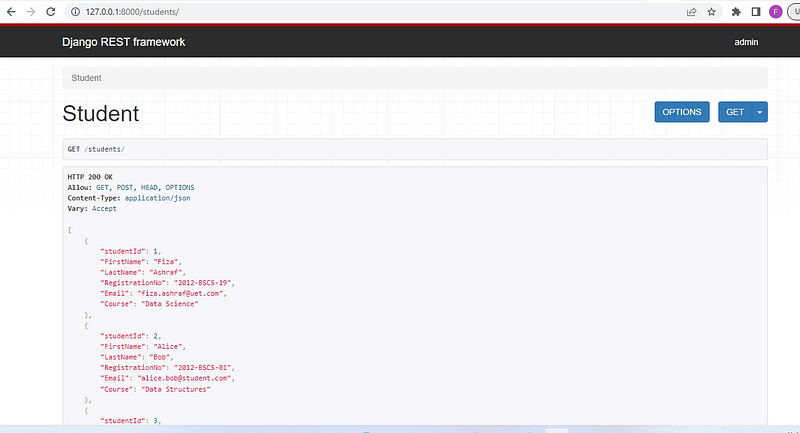
return Response(serializer.data)In get methos we check if user has provided any student_id, if the student id is provided then only one student with that id is retreived from the database. Otherwise all students will be retrieved and returned as JSON. In this case StudentSerilizer is serializing the Django model object into JSON.
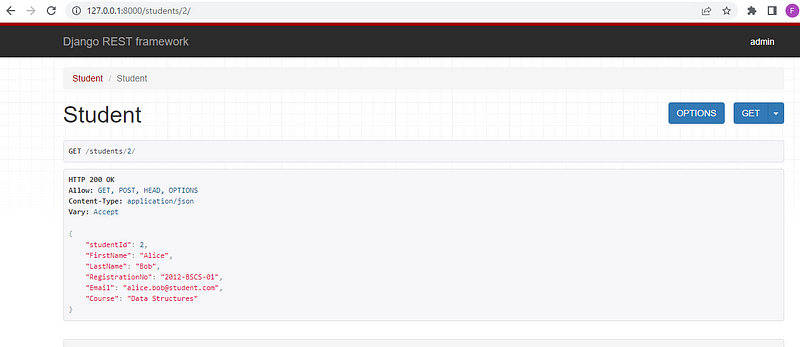
Now if you hit the students URL you should be able to see all students returned in JSON:
http://127.0.0.1:8000/students/
If you want to retrieve only one student e.g. having studentId = 2. Go to URL http://127.0.0.1:8000/students/2. You will receive page not found error:
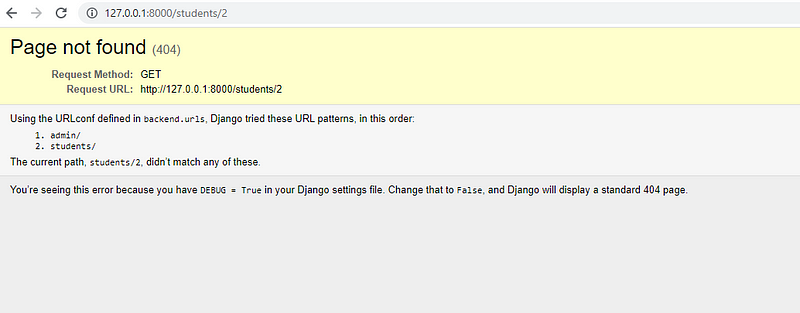
This is because we have not added this URL in URLConf. Open students/urls.py and add the URL in urlpatterns list
path('students/<int:pk>/', StudentView.as_view())The students/urls.py should look like this:
from django.urls import path
from .views import StudentView

urlpatterns = [
    path('students/', StudentView.as_view()),
    path('students/<int:pk>/', StudentView.as_view())
]
Now hit the URL again and you should be able to get the student with id 2:
PUT:
In students/views.py add put method to update the student:
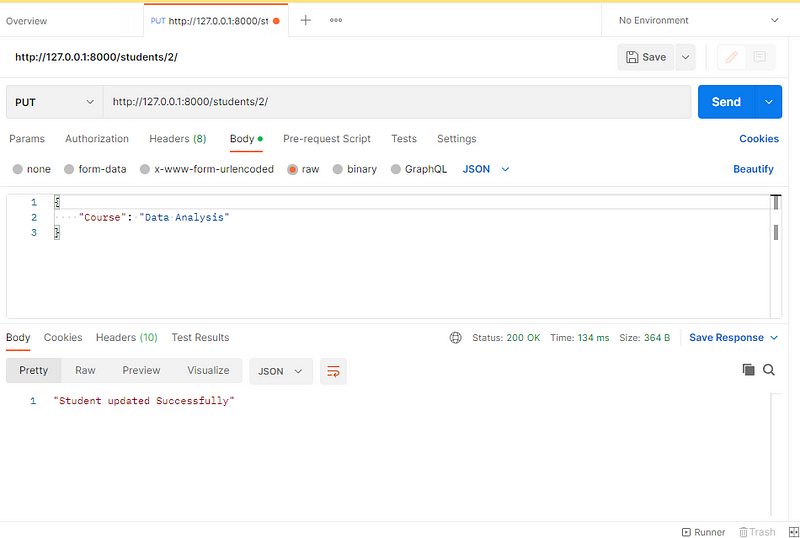
def put(self, request, pk=None):
    student_to_update = Student.objects.get(studentId=pk)
    serializer = StudentSerializer(instance=student_to_update, data=request.data, partial=True)

    if serializer.is_valid():
        serializer.save()
        return JsonResponse("Student updated Successfully", safe=False)
    return JsonResponse("Failed To Update Student")
In StudentSerializer we are passing partial=True to allow the user to pass some or all fields in payload. Since user might not be updating all fields.
You can test this using Postman:
DELETE:
In students/views.py add delete method to delete a student:
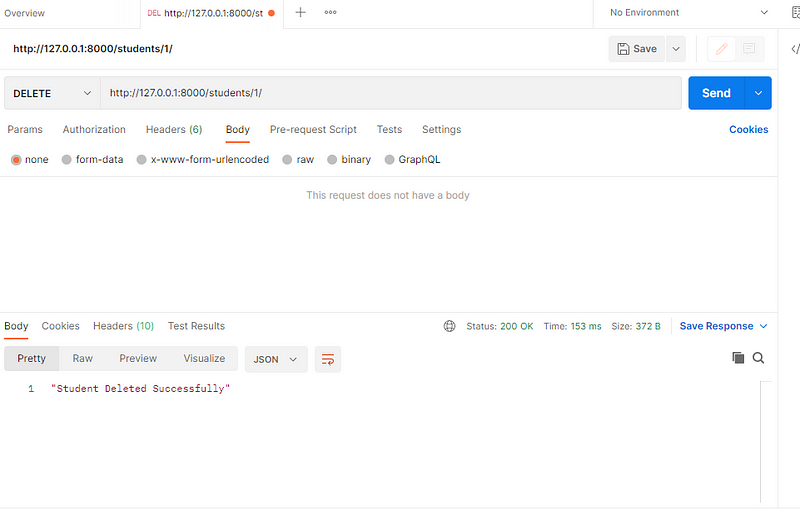
def delete(self, request, pk):
    student_to_delete = Student.objects.get(studentId=pk)
    student_to_delete.delete()
    return JsonResponse("Student Deleted Successfully", safe=False)
Test this using Postman:
Final views.py file should look like this:
from django.http.response import Http404
from rest_framework.views import APIView
from rest_framework.response import Response
from django.http.response import JsonResponse
from .models import Student
from .serializers import StudentSerializer


class StudentView(APIView):

    def get_student(self, pk):
        try:
            student = Student.objects.get(studentId=pk)
            return student
        except Student.DoesNotExist:
            raise Http404

    def get(self, request, pk=None):
        if pk:
            data = self.get_student(pk)
            serializer = StudentSerializer(data)
        else:
            data = Student.objects.all()
            serializer = StudentSerializer(data, many=True)
        return Response(serializer.data)

    def post(self, request):
        data = request.data
        serializer = StudentSerializer(data=data)

        if serializer.is_valid():
            serializer.save()
            return JsonResponse("Student Added Successfully", safe=False)
        return JsonResponse("Failed to Add Student", safe=False)

    def put(self, request, pk=None):
        student_to_update = Student.objects.get(studentId=pk)
        serializer = StudentSerializer(instance=student_to_update, data=request.data, partial=True)

        if serializer.is_valid():
            serializer.save()
            return JsonResponse("Student updated Successfully", safe=False)
        return JsonResponse("Failed To Update Student")

    def delete(self, request, pk):
        student_to_delete = Student.objects.get(studentId=pk)
        student_to_delete.delete()
        return JsonResponse("Student Deleted Successfully", safe=False)
Congratulations, you have completed the backend part of this tutorial. In next part you will learn to develop the frontend in React Js.


Comments
Post a Comment